
Transactions & receipts
Attach a receipt or supporting document
On this page
Attach the receipt where the treasurer will review the purchase. This keeps the bank activity and supporting evidence together.
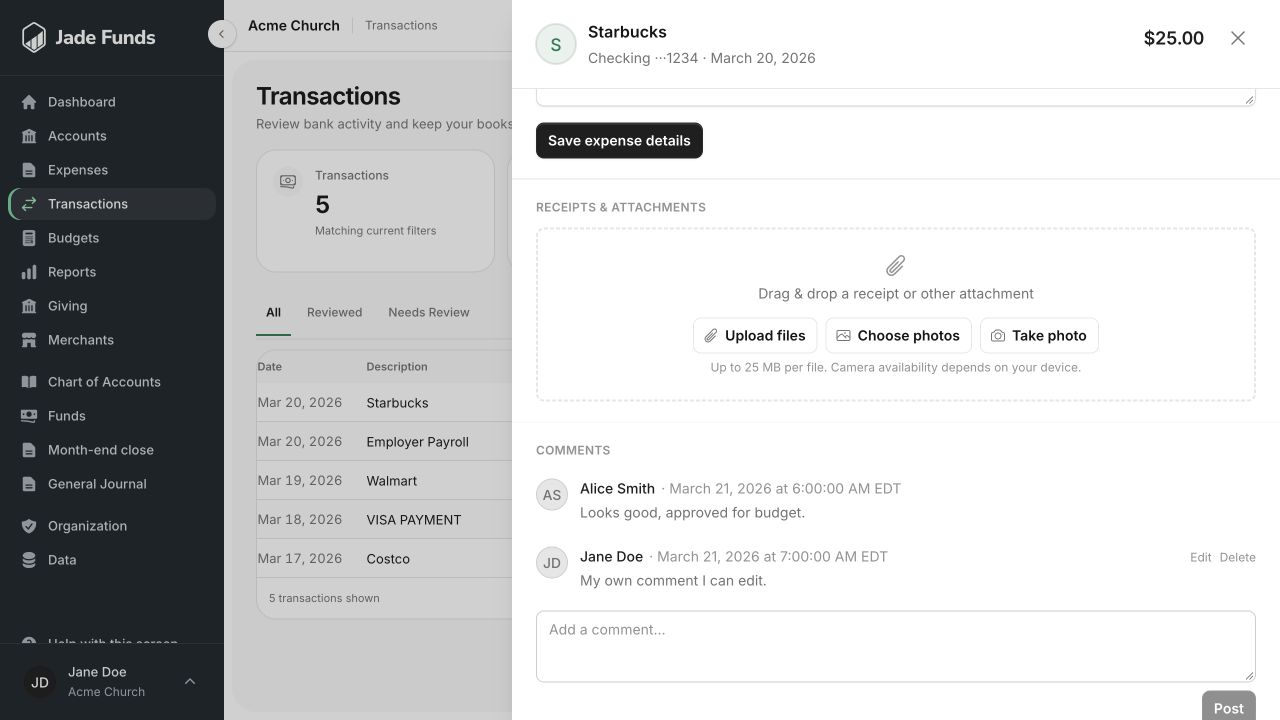
1. Upload files adds a receipt or supporting document.
2. Choose photos and Take photo offer device-dependent image options.
3. Use a comment to explain the ministry purpose or ask a question.
Add the attachment
- Find the purchase in Transactions or the financial account’s history and open its details.
- Find the receipts or attachments area.
- Choose the file-upload option, or drag the document onto the attachment area.
- On a phone, use the photo-library or camera option when available. Check that the full receipt is readable.
- Wait for the upload to finish and confirm that the attachment appears on the transaction.
- Add a recognizable attachment name or a comment if the purchase needs context.
Make the receipt useful
Include the merchant, date, items, and total in the image. For a ministry purchase, explain the event or purpose in a comment; the receipt alone may not tell the treasurer which category or fund to use.
If the upload fails
Check the error shown by the app, your connection, and the file size or type. A file is not attached until the upload completes and it appears on the transaction. Retry only after confirming that the first attempt did not succeed.
Next step
See Add an explanation to a transaction and Categorize and review a transaction.
Was this article helpful?
Still need a hand?
Tell us what you were trying to do and what happened. Leave passwords and bank login details out of your message.
Contact Jade Funds support